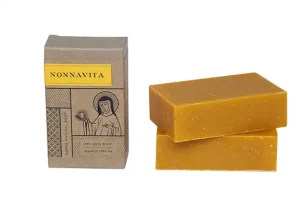
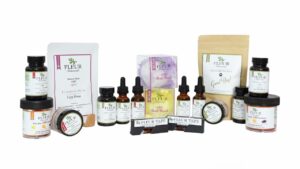
Photographing skincare products for your Amazon
When photographing skincare products for your Amazon listings, it's crucial to convey the product's quality, ingredients, and benefits. Here's what to focus on when capturing images of skincare products:
1. Primary Product Shot: Begin with a clear, high-resolution image of the skincare product as the central focus. Ensure it's well-lit and that the product label is clearly visible.
2. Label Details: Capture close-up shots of the product label, emphasizing key information such as product name, brand, ingredients, and usage instructions.
3. Texture: Showcase the product's texture by photographing it in its container or dispensed onto a hand or skin. This helps customers understand its consistency.
4. Ingredients: If the product contains natural or beneficial ingredients, include images of these ingredients in their natural state or as part of the product.
5. Before and After: If applicable, provide images illustrating the potential results of using the skincare product. Show the "before" condition and the expected "after" improvements.
6. Packaging: Display the product's packaging, whether it's a box, tube, or jar, especially if the design adds value or provides additional information.
7. Customization Options: If the product offers customization options (e.g., choosing a specific formula for different skin types), demonstrate how customers can make their selections.
8. Size Reference: Include a common object, such as a coin or ruler, for scale to help customers understand the product's size.
9. Consistency: Maintain a consistent style throughout your skincare product images to establish a professional and trustworthy brand image.
10. Quality Control: Ensure there are no visible defects or irregularities in the product. Quality control is essential in skincare product photography.
11. Application: Show the product being applied to the skin, either through a hand demonstration or with a clean, unblemished model's face if applicable.
12. Expiration Date: If relevant, photograph the product's expiration date to assure customers of its freshness.
13. Lifestyle Shots: Include images that depict the product as part of a skincare routine, showcasing how it fits into a daily regimen.
14. Ingredient Close-Ups: If the product contains unique or exotic ingredients, provide close-up shots to highlight these components.
15. Scent and Texture: Describe the scent and texture of the product in the image descriptions if possible.
16. Dermatologist Approval: If the product has received dermatologist approval or certification, mention it and display any relevant seals or logos.
Effective skincare product photography not only showcases the product but also communicates its benefits and potential results. High-quality images can instill confidence in potential buyers, who often rely on visual cues to make informed skincare purchases online. By following these guidelines, you can create engaging skincare product listings on Amazon that attract customers and drive sales.
Photographing Handmade Soap for Amazon Listings
Introduction
In the bustling world of e-commerce, a captivating product photograph can make all the difference between your handmade soap standing out or getting lost in the crowd. Amazon, being one of the largest online marketplaces, is no exception. To entice potential buyers and convey the quality and uniqueness of your handcrafted soap, you need to master the art of product photography. In this blog article, we will guide you through the steps to create stunning images that will enhance your Amazon listings and boost your sales.
Step 1: Gather Your Equipment
Before you start shooting, it's essential to gather the necessary equipment. You don't need a professional studio setup, but the right tools will greatly improve your results:
Camera: A DSLR camera is ideal, but a high-quality smartphone with manual controls can also work.
Tripod: A stable base ensures sharp images and allows for consistent framing.
Lighting: Natural light is often the best choice if you lack lighting experience, but you can use softbox or diffused artificial light for more control.
Background: A clean, neutral backdrop like white, gray, or black will make your soap stand out. Amazon wants white for main listings.
Props: Consider adding complementary elements like dried flowers, wooden trays, or decorative fabrics for a touch of sophistication., but not for the main images.
Step 2: Set Up Your Shooting Space
Choose a well-lit area with ample natural light, such as near a window. If you're using artificial light, make sure it's evenly distributed to avoid harsh shadows. Set up your tripod and position it at eye level with the soap to create a balanced composition.
Step 3: Soap Placement and Composition
Arrange your handmade soap creatively, keeping in mind the key elements of composition:
Rule of Thirds: Place your soap slightly off-center for a visually pleasing composition.
Depth of Field: Use a wide aperture (low f-stop number) to create a blurred background (bokeh) and make the soap pop.
Angles: Experiment with different angles to find the most flattering perspective. A 45-degree angle often works well.
Negative Space: Leave some empty space around the soap to draw attention to the product.
Step 4: Lighting
Good lighting is the heart of any great photograph. If you're using natural light, shoot during the day when it's bright but not too harsh. Soft, diffused light creates gentle highlights and shadows, which can emphasize the soap's texture and details.
If you opt for artificial light, use softboxes, diffusers, or reflectors to create a soft, even glow. Avoid harsh, direct light as it can create unflattering shadows and reflections.
Step 5: Camera Settings
Set your camera to manual mode for greater control. Here are some recommended settings:
ISO: Keep it as low as possible to minimize noise (typically around ISO 100-400).
Aperture: Use a wide aperture (e.g., f/2.8 or lower) for a shallow depth of field, but keep the product in focus. Start with F4 would be a good starting point.
Shutter Speed: Aim for a fast shutter speed to prevent blurriness, especially if you're not using a tripod.
White Balance: Adjust to match the lighting conditions for accurate colors.
Step 6: Focus and Sharpness
Ensure your soap is sharp and in focus. Use manual focus if your camera allows it or tap on the soap's area in your smartphone's camera app to focus accurately.
Step 7: Editing
After capturing your images, use photo editing software like Adobe Lightroom or free online tools like Canva to enhance your photos. Adjust exposure, contrast, saturation, and sharpness as needed. Correct any imperfections and ensure the background is clean and consistent.
Step 8: Consistency is Key
Maintain a consistent style for all your soap images to create a cohesive Amazon listing. This includes using the same background, lighting, and editing techniques.
Step 9: Multiple Angles and Details
Capture your soap from different angles and focus on its unique features. Show its texture, color, and any special ingredients or patterns. Include close-up shots to highlight intricate details.
Step 10: Test and Test some more
Don't be afraid to experiment and fine-tune your photography skills. Test different setups, lighting angles, and compositions to find what works best for your handmade soap.
Conclusion
In the competitive world of e-commerce, high-quality product photography can set your handmade soap apart from the rest. With the right equipment, lighting, composition, and editing, you can create stunning images that entice Amazon shoppers and boost your sales. Remember that practice makes perfect, so don't be discouraged if it takes time to achieve the desired results. As you continue to refine your photography skills, your handmade soap listings on Amazon will shine brighter than ever before.
Title: Benefits of Realtors Using Professional Business Portraits
Introduction
In the highly competitive world of real estate, establishing a strong personal brand and professional image is crucial for success. One often-overlooked aspect of building this image is the use of professional business portraits. These photographs serve as a visual representation of a realtor's professionalism and credibility, and they can be a powerful tool for marketing and networking. In this article, we will delve into the benefits of realtors using professional business portraits, covering what to wear, the choice between on-location or studio sessions, and how these photos can be effectively used for marketing purposes.
A: What to Wear
The first step in creating a compelling professional business portrait is choosing the right attire. What you wear in your portrait can significantly impact the impression you make on potential clients, colleagues, and partners. Here are some key considerations:
Professional Attire: Realtors should always opt for professional attire that reflects the industry's standards. For men, this typically means a well-fitted suit, dress shirt, and tie. For women, a stylish blouse and blazer or a professional dress are excellent choices.
Neutral Colors: When selecting clothing, opt for neutral colors such as black, gray, navy, or white. These colors are timeless and convey a sense of professionalism. Avoid flashy or distracting patterns and bright colors, as they can divert attention from your face and your message.
Clean and Well-Groomed Appearance: Ensure that your clothes are clean, well-ironed, and fit you properly. Pay attention to personal grooming, including well-kempt hair and minimal accessories. A polished appearance reflects your attention to detail, which is a valuable quality in the real estate industry.
Branding Considerations: If you have a personal brand logo or color scheme, consider incorporating it subtly into your attire or background. This consistency can help reinforce your brand identity.
Comfort and Confidence: Choose clothing that you feel comfortable and confident in. Confidence will come through in your photographs, making a positive impression on viewers.
B: On Location or Studio
The choice between an on-location photoshoot and a studio session depends on your personal preferences and the image you want to convey. Both options have their advantages:
Studio Portraits:
Controlled Environment: Studio sessions provide complete control over lighting, background, and other elements. This control allows for precise adjustments to create a polished and professional look.
Minimal Distractions: Studios eliminate potential distractions, ensuring that the focus remains solely on you. This can be particularly beneficial for creating a clean and uncluttered portrait.
Consistency: Studio portraits offer a consistent and cohesive look, making them ideal for branding and marketing materials.
Professional Lighting: Studio photographers are equipped with professional lighting setups, which can result in well-lit and flattering portraits.
On-Location Portraits:
Authenticity: On-location photoshoots can capture a more authentic and relatable side of a realtor's life. For instance, a portrait in front of a luxury property can convey success and expertise in the real estate market.
Personal Connection: Photographs taken at a location that holds personal or professional significance can help establish a deeper connection with clients and prospects.
Diverse Settings: On-location portraits offer a variety of settings and backdrops, allowing you to choose a location that aligns with your brand or story.
Lifestyle Portraits: These sessions can include shots of you in action, showcasing your approach to real estate. For example, you could be shown discussing property details with a client or conducting a home tour.
Ultimately, the choice between on-location and studio portraits should align with your personal branding strategy and the message you want to convey.
C: How the Photos Can Be Used for Marketing
Professional business portraits are versatile assets that can be used across various marketing channels to enhance your real estate business. Here's how you can leverage these photographs effectively:
Online Presence:
Website: Feature your professional portrait prominently on your website's homepage and "About" page. This adds a personal touch and builds trust with visitors.
Social Media Profiles: Use your portrait as your profile picture on LinkedIn, Twitter, Instagram, and other relevant platforms. Consistency in your online presence helps people recognize and remember you.
Email Signature: Include your portrait in your email signature. It adds a human element to your communications and makes your emails more personal.
Printed Marketing Materials:
Business Cards: Incorporate your realtor business portrait into your business card design. It helps potential clients put a face to your name and remember your services.
Brochures and Flyers: Use professional portraits in marketing materials, such as brochures and flyers, to create a polished and trustworthy image.
Public Relations:
Press Releases and Articles: If you're featured in press releases, articles, or interviews related to real estate, provide your portrait to publications. It gives your contributions more credibility.
Speaking Engagements: Use your portrait when promoting speaking engagements or workshops. It enhances your visibility as an industry expert.
Online Listings:
Property Listings: Including your portrait alongside property listings adds a personal touch, demonstrating that you are the face behind the properties being advertised.
Virtual Tours: If you create virtual tours of properties, consider including a brief introduction with your portrait to connect with potential buyers.
Networking:
Business Networking: Share your professional portrait when networking with other professionals in the industry. It facilitates recognition and fosters connections.
Events and Conferences: Display your realtor business portrait on your booth or promotional materials during real estate events and conferences.
In conclusion, professional business portraits are a valuable investment for realtors. They convey professionalism, build trust, and enhance your personal brand. By carefully selecting your attire, considering the location, and strategically using these photographs in your marketing efforts, you can distinguish yourself in the competitive real estate market and leave a lasting impression on clients and colleagues alike.